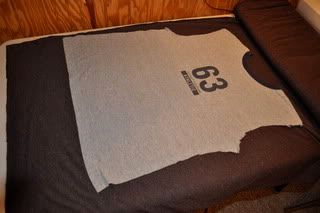
What you need:
~Knit Fabric
~Knit trim (I used some from an old tshirt, but again, I ended up taking it off)
~Sewing Machine or Serger (I didn't have my serger at this point)
~Pins
~Scissors
Note: The nice thing about sewing with knit is that it doesn't fray! Also I use a quarter inch seam allowance (unless otherwise stated)
Disclaimer: Somehow I'm missing some pictures....not sure how, but I tried to explain it the best I can!
Now onto the tutorial!
I started off by taking a shirt apart that I no longer wore (and that I like the fit of).
I got out my fabric and cut out two sides (front and back body peice)
Pin and cut out around your “pattern”
SLEEVES: I did not get a picture of this. but trace and cut out the the sleeves as you did with the body of the shirt (cut two).
I started to do a trim on the sleeves (which didn’t work out so I ended up taking it off), but if you want to add trim take the trim and sew it to the end of the sleeve. I folded mine similar to bias tape so that the inside peice was longer than the outside peice to make sure that you got the inside with the outside when you sewed it together.
The trim on the sleeve is done!
If you don’t add the trim....just fold under and sew along the edge (I sewed 1/4 of an inch away from the edge).
Now onto the sewing the sleeve in. I found the center of the sleeve (by folding it in half and maked the place with a needle.
The body peice (not pictured) I sewed the two body pieces together at the shoulder.
Than I set the sleeve in (with lots of pins) and sewed the sleeve in. This was a lot easier than I thought it would be!
Finish sewing the sleeve in.
Remember: you don't have to zigzag stitch the seams closed because knit fabric doesn't unravel!
Than sew down the side seams and you’re finished (except the neckline)
For the neckline I made ruffles and sewed them unto the front of the shirt (here's a good tutorial on how to do ruffles). I found out it's even easier with my machine, I just turn my tension up to 9 (as tight as it can go) and it ruffles right up for me.
Close up of the neckline!


No comments:
Post a Comment